This is a five-part article. Here are links to the parts.
--------------------
Part 1: The basics
Part 2: Creating a starter
Part 3: Mixing dough
Part 4: Baking
Part 5: Upping your game
--------------------
WHAT IS A STARTER?
Sourdough bread doesn’t use commercial yeast. It uses a sourdough ‘starter’, which is a culture of natural yeasts and bacteria that are found in the air and that thrive in a mixture of water and flour.
You create your starter by simply setting out a jar or bowl containing a mix of flour and water and allowing it to collect those airborne yeasts and bacteria. Once they take hold — a process that takes several days — they begin to digest the mixture, creating gases that cause the mix to ‘rise’.
When your culture is established, you keep it going by feeding it every day (or, if you put your baking on hold, you can put it in the refrigerator and feed it only occasionally).
This is your starter. It’s your yeast.

Making starter is pretty simple. Begin with one hundred grams of fifty-fifty flour (that is, a fifty-fifty mix, by weight, of whole wheat flour and bread flour).
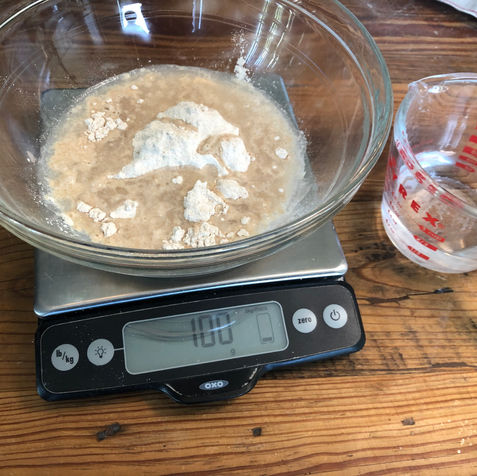
Mix 100 grams of 50-50 flour and 100 grams of water
First, put 100 grams of the 50-50 flour mix into a mixing bowl. Pour 100 grams of water into the flour. Mix it all together with your fingers.
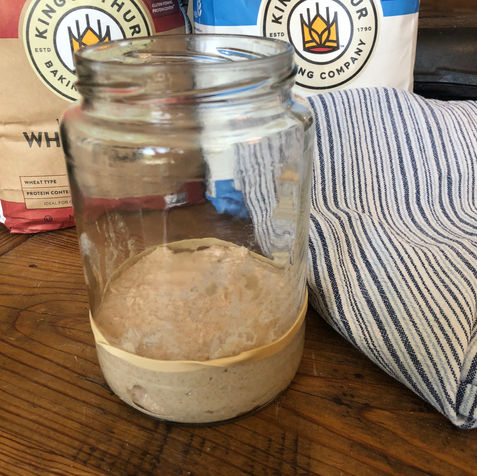
When you’re done mixing, transfer the mix to one of your large jars. It's my habit to mark the height of the mixture by putting a rubber band around the jar. That makes it easier to see if it's active and growing.
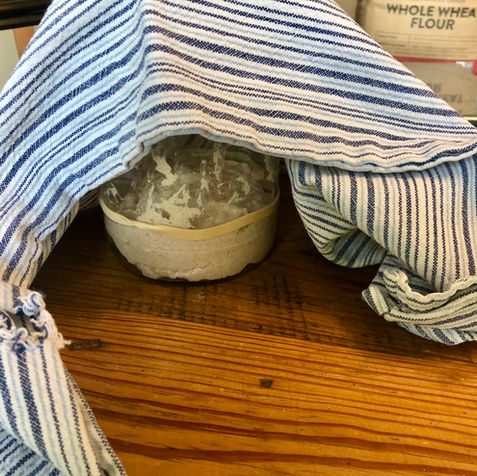
Put a dishtowel over the top of the jar and put it somewhere to sit for a few days. Ordinary room temperature is fine.
By the way, the water you use for the mix shouldn’t be either cold or hot; the New York Times recipe says 80º, but I don’t worry about precision here. I just stick my finger in the water streaming out of the tap and make sure it’s neither hot nor cold.
Check each day for activity
It may take two or three days for the starter to show any activity.
‘Activity’ means that you’ll see small bubbles forming in the mixture when you look at it through the side of the jar. When those bubbles begin appearing, it means the starter is becoming active. After a while, the mixture will increase in size, too. If you marked your jar with a rubber band, you'll see the difference.
I prepared a new starter in order to get photos for this article. My starter took just 32 hours to become really, really active. I mixed it at about 1:30 in the afternoon on Saturday. The sixth photo above was taken at 10:00 PM on Sunday, and it shows the mixture fully active and more than three times the original size.
By the next morning, the starter had collapsed. Which is fine. It was no longer active, but it was ready to be fed again.
At this point, you should move to maintenance mode, as described below. You should maintain the starter for a few days before you use it to make bread. You'll know it's ready when it reliably shows activity and growth each day after feeding. It will also smell a bit sour.

PREPARING A FLOUR SUPPLY FOR FEEDING YOUR STARTER
Your starter is based on flour and water in a roughly fifty-fifty mix, by weight.
There are many different opinions about the type of flour you should use in your starter. I use a fifty-fifty mix of bread flour and whole wheat flour, and that’s what I suggest you use.
So, before you do anything else, you should put together a big supply of that mix. So, mix together:
1 kilogram of bread flour
1 kilogram of whole wheat flour
Now you can store that and use some of it every day for feeding your starter.
Store the rest of your bread flour and whole wheat flour in air-tight containers. You’ll be using those flours in varying amounts to make dough.
CREATING YOUR STARTER
Creating your starter is pretty simple. It’s mostly a matter of waiting. Here are the steps.

Maintaining your starter means feeding it daily. Between feedings, I place a (hole-punched) cover on the jar, and then rubber-band some cheesecloth over the top.
MAINTAINING YOUR STARTER
Once your starter is active, you can begin feeding it every morning. You should aim to feed it at about the same time every day.
I usually feed my starter between 7:00 AM and 8:00 AM. It's not a big deal if you're early or late. In fact, it's not a big deal if you miss a day or two, but, if that happens, you may want to get back on schedule for a couple of days before using it in bread.
Feed your starter every day
To feed, you’ll discard about 80% of your active starter and feed what remains.
Yes, I know that sounds wasteful. If you really get into this, you’ll find lots of uses for that ‘discard’, including, for example, sourdough pancakes.
The first time you feed a newly-created starter, there may be a bit of dark liquid sitting on top of the mixture, and the top may be a bit crusty. If so, just pour off the liquid and scoop off the crust and use the starter that’s beneath the surface.
In maintenance mode, for daily feeding, I use my small jars so I can minimize the amount of flour I need to use. With the big jars, I feed 100 grams or more of the 50-50 flour mix, along with 100 grams of water. With the smaller jars, I can get by with just sixty grams of each.
Anyhow, every day, you’ll do the same thing: Discard 80% of your starter and feed what remains.
Instead of covering the jar with a dishtowel, put a lid on it (the lid should have a hole punched in it, to admit a bit of air). I also cover the lid with cheesecloth, held in place by a rubber band. The cheesecloth keeps out fruit flies. (The first time I did this, without the cheese cloth, within days a handul of fruit flies had appeared in my kitchen.)
If you feed in the morning, you’ll notice that by mid-afternoon the mix has puffed up to double or triple its original size.
Incidentally, you’re not baking for a while, you can save both flour and effort by putting the mixture in the refrigerator and feeding it just once every week or two. When you remove it from the refrigerator to use it for baking, it will take a couple of days to revive it to normal behavior.
The starter is fundamental to all your sourdough bread baking. In the next part, we'll show you how to mix dough, using your starter to make it rise and to give it flavor: Part 3: Mixing dough
Jim Feuerstein is co-editor of LNF Weekly; he also designs and manages the website.


Your sourdough starter is a mix of flour and water that you leave out, covered lightly with a towel, for several days. The mixture picks up yeasts and bacteria from the air (and from your hands, when you mix it), and eventually a culture forms that feeds on the flour and produces gases that make the mixture bubble and rise. Cultures are slightly different from place-to-place, so your starter will be puro Southtown.
You might also like...


